Thursday, December 15, 2011

Etiquette: Thank you Notes and Kids

Even Santa writes Thank You notes!
The joy of Christmas for children often has to do with opening presents and there are many important life lessons to be learned.  This is a perfect opportunity to teach how to express gratitude for all the gifts received.  No matter the age, it is important to take the time to thank the person for their gift.  As parents, we need to model this.  My son made me a gift for Christmas at school.  I thanked him the the special gift and later put a thank you letter in our mailbox for him expressing my gratitude.  He was so excited to find that letter in the mailbox.
My mom always has a thank you note in the mail within days of receiving a gift.  I am always amazed but know how much she appreciates any token of love given to her.  I remember as a child having to write thank you notes with my brothers after Christmas.  It was not my most favorite day, but looking back I am so glad my mom made us write them.  Now that I am the mom, there are a few ways I think I can make it a little less painful for all involved.  
Type of Cards:  
Photo cards:  Take one of your favorite holiday photos and turn them into personalized note cards.  You can make your own by printing out your photo and gluing them on paper or go to any online photo store and upload your photo to create your cards. (www.shutterfly.com , www.cvsphoto.com)
Child Creations:  If your child likes to draw, let them draw the front of the card.  If they have a lot of thank you notes to write, you can scan the art and print additional cards.
Store Bought:  Let your child pick out their own stationary
What to say:  Thank the gift giver for the particular gift and tell them why or how it is appreciated, even if it is not the “best” gift.  Mention something special about Christmas and wish them a Nappy New Year.  Keep it simple!
Young Children:  Adults can write the letter by asking their children about the gift and why they like it.  This is a good time to model writing with your children and teach beginning sounds.  You can have them “write”/scribble their names.
Writers:  Encourage your child to write what they can or even do a fill-in the blank type card.

Let you children take part in putting on the stamp, putting stickers on the envelops or walking them out to the mailbox.  Tell them how happy the receiver will be when they get their special note in the mail.
Thank you for reading this and I hope you and your children have fun writing your Thank You notes together. 

Thursday, December 8, 2011

Photo Gifts


This project is for the moms.  These were my "crafty" Christmas gifts for my family last year.
Basic Directions:
1. Cut or buy a wood block from your local craft store the size you want
2.  Paint sides that will not have a photo
3.  While drying, choose your photos.  You may print off your computer using cardstock or photo paper.  Trim photos to fit the sides of your block
4. Mod Podge your photos onto the blocks.  Paint onto the block first, place photo, then Mod Podge onto of photo.
* For the ornaments, I used 4 photos to go around the block.  Then used a staple gun to attach a mini bow on the top of the block.  Finally, tie a piece of ribbon through the bow and write the year on the bottom.  I thought this would be a great ornament to do each year of your children.  You can pick 4 of your favorite photos of your child from the year.  What a great way to look back at your child's growth.

*The larger blocks (2 1/2 inch) were for my parents.  Each block represented one of their children (3) and their family.  The fourth block included everyone's wedding photo and grandchildren altogether. The top of each block I printed out a family photo with a typed verse on it.  This is something they can keep out all year.

Tuesday, December 6, 2011

Come Light the Menorah!

Here is a simple hanpdprint menorah that you can make with your child.  You may use giant washable ink pads or paint.  Paint hands blue and press on paper, one at a time.  Have the thumbs touching.  Then paint thumb yellow and press above each finger for the flame.  You may use glitter to make it sparkle. 

*Hanukkah begins at sunset on Tuesday, December 20, 2011, and ends at sunset on Wednesday, December 28, 2011.

*What is a Menorah?
The Menorah is one of the oldest symbols of the Jewish faith. It is a candelabrum with seven candle holders displayed in Jewish synagogues. It symbolises the burning bush as seen by Moses on Mount Sinai. The two most common menorahs have seven and nine candle-holders. The term hanukiah or chanukiah, refers to the nine-candled holder used during the Jewish festival of Hanukkah. 

Friday, December 2, 2011

Handy Christmas Crafts to be Treasured


Looking for some simple, versatile Holiday crafts to make with your children.    Here are three of my favorites that can be used for cards, ornaments or even framed art for family members this year.  The best part is that you can do these with any age, even newborns!
All the crafts need washable acrylic paint, sponge paint brushes, cardstock, glue and markers for details.  Colors depend on the craft.  Materials can be purchased at Michaels' Craft Store.   http://www.michaels.com/  Don't forget to have handy wipes ready!!

1.  Santa Handprint: Paint red on the tip of your child's thumb and across the top of your child's palm.  Paint the fingers and rest of the palm white.  Press down on cardstock.  Repeat if you are making more that one.  Once dried, add details.  Glue a cotton ball at the end of the thumb for Santa's hat.

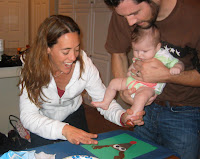
2.  Angel:  Paint bottom of your child's foot white, have them stand and press on cardstock.  Then paint both hands white and press on either side of the footprint.  Once dried, add halo and face details.  This is great framed for grandma.

3.  Rudolph:  Cut out a brown triangle and glue on cardstock.  You may use hands or feet for the antlers.  Found it easier to paint infants feet than hands.  Paint hands (or feet) brown and press on the top corners of the triangle.  Once dried, add details.

I hope this inspires you to get creative and have fun this Holiday Season with your kids.

Sunday, November 13, 2011

Time for THANKS

Thanksgiving is a week away and we have been spending a lot of time talking about who and what we are thankful for.  I have been modeling various ways to give thanks.  My son and I love to bake so we decided to make a few loaves of zucchini bread and create simple cards to deliver to some people we appreciate.  When the bread cooled, we divided and wrapped up the bread. (Fall paper plate and foil, nothing fancy!)  We handed out our homemade treats throughout the week to the puppet show ladies, our trashman, preschool teachers, and the fire station.  Shay loved handing out his gifts and the recipients were thrilled and surprised to receive this gift of thanks.   
*Remember to keep it simple, fun and a positive experience.  If you see your child getting frustrated or bored when making the cards, put it away and come back to it when they are ready.  No need to complete it at one time. Practice what to say before delivering the packages. 

Here are our favorite recipes and healthy too:
Zucchini bread that uses apple sauce and chocolate chips - YUM!
http://www.skinnytaste.com/2011/07/low-fat-chocolate-chip-zucchini-bread.html
Pumpkin Muffins: http://www.achildgrows.com/2007/11/30/pumpkin-muffins-recipe-healthy-but-good/

A great article on teaching children how to be grateful: http://www.parents.com/toddlers-preschoolers/development/behavioral/teaching-children-to-be-grateful/

For more Thanksgiving Ideas: turkey time http://mrsodaniels.blogspot.com/2010/11/turkey-time.html
tree of thanks http://mrsodaniels.blogspot.com/2010/11/thankful-tree.html
nuts about you http://mrsodaniels.blogspot.com/2010/11/nuts-about-you.html

Sunday, October 23, 2011

Sweet Dilemmas: Halloween Candy - Now What!

All year long we talk about the bad "sugar bugs" on our teeth and making good, healthy food choices.   Then comes Halloween!  I enjoyed researching various options on what to do with all the Halloween candy collected.  This is the first year I am actually concerned about how to deal with all the treats that will be brought home.  In the past, my son played with the candy without realizing it could be eaten!  A day or two after Halloween, the candy just disappeared and it wasn't a problem.  This year, may be a different story. He now knows that there are very delicious treats underneath the bright colored, crinkly wrappers.
Here are some fun and creative ideas I found.  I hope you will find them useful with your family.
* Immediately throw away all choking hazards.  Hard candy is the worst!*
1.  The Great Pumpkin or Sugar Fairy or The Switch Witch:  The kids pick a few pieces of candy (your discretion) and place the remaining candy on their doorstep before they go to bed and when they wake up the candy has been replaced with a present for the child and a thank you note.  Keep the gift small, Christmas is right around the corner!  This can be done a day or two after Halloween.
2.  Pick out and save candy to decorate a gingerbread house at Christmas time. (Use glue when attaching the candy so it won't be edible.)
3.  This can be a good opportunity to read the ingredients together and look for the really bad stuff: high-fructose corn syrup, partially hydrogenated oils, artificial coloring, etc...  Go to a natural food store with your child and have them pick "healthier" alternatives instead.
4.  Use it as a learning tool: counting, matching, sorting, graphing, weighing, estimating, patterning
5.  Candy Science Experiments: http://www.candyexperiments.com/
6.  Operation Shoe Box will send it to over to our troops http://www.operationshoebox.com/
7.  Local dentists will buy back candy, enter zip code to find one near you: http://www.halloweencandybuyback.com/index.html
8.  Movie Stash: Save some money at the movie theater by bringing your own candy.
I want to set a good example for my son, so the sooner the candy is out of the house, the sooner we can get back to living a healthy lifestyle. 
Do you and your family have any special traditions or ways to limit candy intake?

Boo-tiful Ghosts Again!

I had to re-post this project because this is one that you can do year after year, especially if you've had any new additions to the family.  This year I will be doing this activity with my son's preschool class.  The kids will be painting these ghosts on trick-or-treat bags.  On another day, the parents will be passing out non-sweet treats to the kids at the end of class so the kids can practice saying "trick-or-treat" and "thank you!"
http://mrsodaniels.blogspot.com/2010/10/adorable-ghosts.html  or you can read more at http://www.lamorindaweb.com/articles/family-parenting/1673-boo-tiful-ghosts-worth-treasuring

Thursday, September 29, 2011

Nature's Calling - Adventures and Activities

Signs of Autumn are everywhere.  It is a great opportunity to get outside with our little ones and use our senses to enjoy the beauty of the season.  
Time to go exploring:  Whether you head out to your backyard, local park or trail, bring a bucket or bag to collect any small treasures your child finds on the ground, such as acorns, pine cones, leaves, rocks, twigs, etc.   Take time to stop and listen to the sounds of the rustling leaves, singing birds, or squabbling squirrels.  Look for living creatures of all sizes and examine a spider’s web.  Count the birds in the sky.  Find leaves of different colors, shapes and sizes.  Figure out which tree dropped their new found treasures.  Don’t forget to discuss being respectful toward nature.
Autumn Treasure Activities:  There are so many ways your child can have fun and learn from what they found on their nature walk.  Keep their treasures safe in a container outside so that throughout the season they can use their items or add to their collection.  
Here are some basic math concepts that you can work together on with your child.  Begin by “sorting” the items into groups.  Depending on the age of your child, have your child “sort” the leaves by color or size.  Have them line up some items from smallest to biggest to develop “sequencing” skills.  They can create math “patterns”, such as acorn, leaf, acorn, leaf.  They can “count” how many pine cones they found.  They can “add” pine cones plus rocks to find the total.  If you have a lot of acorns you can do a counting game with the numbers 0-5 using an empty egg carton.  Write # 0-5 at the inside bottom of each egg cup in the carton.  Place one acorn in the egg carton.   The first person shakes the closed egg carton then opens to see what number is under the acorn.  They collect that number of acorns from a pile.  Take turns until all the acorns are gone.  Each placer counts their pile of acorns.  The player with the most wins.
Acorn Counting


When all the counting is done, time to get creative.  Set out some art supplies and let them create a collage from their walk.  If they found a lot of crunchy leaves, have them crunch up the leaves and glue on a leaf cutout for a mosaic.  Paint the rocks and pine cones.  Don’t forget to draw faces on the acorns.  The ideas are endless.  Let your child come up with some of their own creations.  
Crushed Leaf Mosaic
What are some of your fun Fall activities?  I have to admit, having just moved here from Orange County, we looking forward to jumping in the leaves.  My son and I used to pretend racking and jumping into a huge pile of leaves, but this year we get to do it.  Happy Fall!

Saturday, September 17, 2011

Hand Eye Coordination and Just Plain FUN

Here is a fun and easy way to develop hand eye coordination (gross motor skill).
I tied a Wiffle ball onto a string which I tied to a tree branch.  Wiffle balls work great because they have holes on the top and bottom so you can attach the string, they are cheap, and they don't hurt if they hit you.  The "bat" is actually a styrofoam noodle we use at the swimming pool.  We cut it into 2 pieces so we each had our own bat.  Then we were ready to play.
Disclaimer: I actually saw this done at a Star Wars birthday party at a park. The mom put some silver duck tape on the bottom of the bat to make it look like a lightsaber.  The boys at the party loved it!

A few words on Hand Eye Coordination:  It is the ability of the eyes to guide the hands in movements. Why is it so important for your child to develop this skill?
  • In gross motor games, hand eye co-ordination can help your child to catch a ball and hit a ball with a bat.
  • In school, visual-motor integration, which is a vital skill for handwriting, grows out of a good hand-eye co-ordination base. The eyes need to guide the hand in forming the letters and making sure they stay within the lines.
  • Eye tracking skills, which are vital for reading, can also develop through the gross motor games used for hand eye coordination.

Thursday, September 15, 2011

Kindergarten Readiness

After my discussion with the Lamorinda Mom's Club on Kindergarten Readiness, I wanted to share some websites I found that have a lot of great information.
* In the end, remember that all our children will "bloom".  Enjoy the journey!
http://photo.goodreads.com/books/1172865756l/225542.jpg Leo the Late Bloomer by Robert Kraus
Kindergarten Readiness: http://www.education.com/topic/kindergarten-readiness/

http://www.googobits.com/articles/p0-1650-is-your-child-kindergartenready-what-you-need-to-know.html

http://www.scholastic.com/resources/article/ready-for-kindergarten

Transitional Kindergarten: http://www.cde.ca.gov/ci/gs/em/kinderfaq.asp
http://www.preschoolcalifornia.org/our-issues/transitional-kindergarten/tk-101.html
Please email me with any questions!  I am available to come to play groups to work with your kids as well as give parents new ideas.  dcodaniels@gmail.com

Friday, September 9, 2011

"Twas the Night Before School Started"

My sister-in-law shared this with me and I thought was appropriate...

Twas the night before school started,
When all through the town,
The parents were cheering.
It was a riotous sound!
By eight, kids were washed
And tucked into bed...
When memories of homework...filled them with dread!

New pencils, new folders, new notebooks, too!
New teachers, new friends...their anxiety grew!
The parents just giggled when they learned of this fright
And shouted upstairs-...
GO TO BED-IT'S A SCHOOL NIGHT!

I pray all our children have a wonderful year of growth!
Good Luck with the upcoming school year!  


http://mrsodaniels.blogspot.com/search/label/Class%20Schedule

Friday, September 2, 2011

Back to School - One More Thing...

Congratulations Moms!  You've successfully gotten your little ones off to school.  Hopefully you were able to document the "first day of school" with their photo.  But there are a few other important items you may want to cover.   Handprints are always fun to see to show their growth as well measuring their weight and height.  I used the Giant Washable Ink Pad from Lakeshore Learning for the handprint.  It is a lot easier and cleaner than paint.

For more ways to organize your child's artwork, check out: http://mrsodaniels.blogspot.com/2011/07/organizing-your-childs-masterpieces.html
 

Tuesday, August 30, 2011

Kindergarten Readiness Presentation for Lamorinda Moms!

Never too early to learn and talk about Kindergarten Readiness.  I'm looking forward to speaking at the September Lamorinda Mom's Club Night Meeting. My goal is to educate and give parents confidence as they prepare their children for school.
Who:  Lamorinda Moms
When:  Tuesday, September 13th, 7:00-9:00 
Where: Lafayette Library,  3491 Mt. Diablo Boulevard, Lafayette, CA 94549


Our guest speaker will be Lamorinda Mom, Diana O'Daniels. Diana is the mother of a preschooler and former kindergarten teacher, pre-K and mommy-and-me instructor. You can check out her blog: http://www.mrsodaniels.blogspot.com/
Diana will present the signs of academic and social readiness for kindergarten, and she will provide fun and simple preparatory activities for you and your child to work on together at home. She will review the pros and cons of starting your child early or holding him/her back.
Know what to look for now so you can feel confident in making this decision, when the time comes. We hope you'll join us!
Moraga's Mommy and Me Class begins Tuesday, September 20!  Register Now
http://mrsodaniels.blogspot.com/2011/08/fall-fun-mommy-and-me.html

Monday, August 1, 2011

Post-It Notes - Why I Love them

This is a fun and easy game to prepare.  Your child will love playing!  Number Search:
Step 1.  Using adding machine paper roll, write the numbers 1 through 12 on it and tape it to the wall.  Step 2. Write the numbers 1 through 12 on individual post-it notes and hide them around the house. Step 3.  Have your child search and match the numbers found and put them on the number line.
We played the Number Search a few times.  The last time, my son hid the numbers and I had to find them.  Be sure to ask your child questions about the numbers along the way, "What number did your find?"  or "What numbers are left for you to find?"  The number line is now hanging in his room.  He can go and move the numbers around on his own.
Depending on the level of your child, you can draw dots on the post-it notes representing numbers through 12 and your child will have to count the dots and then match the number on the number line.
This also works for practicing letters, upper and lower case, shapes, sight words or whatever skill you want your child to review.

3M Post-It notes are my favorite because they stick even after pulling them off and on paper/walls numerous times.  They also come in a variety of fun shapes and colors.  I've used cheap brands and their "stick" does not last.

Thursday, July 21, 2011

Organizing Your Child's Masterpieces!

I am looking forward to “oohing” and “ahhing” over the masterpieces my son will be creating in preschool this year.  Yes, this is my first born heading off to school and I am beginning to worry about what to do with all the art he will be bringing home.  This is a serious problem, but with some thought, I have created a plan so I am feeling a little less anxious about the wealth of work that will be coming home.
First things first, we can not keep it all so here are some ideas:
1.  take a digital photo, especially of large pieces or 3-D projects.   There are so many ways to reuse their art using companies like Shutterfly.  At the end of the year you can create an online art portfolio book, make greeting cards or mugs to give as gifts, or make “thank-you” notes.  I’ve also see having their art printed on a canvas or postage stamp.
2.  display the art in your child’s room, playroom, or garage.  Be sure to “rotate” the art per season/month and take a photo of the mural before taking it down.  Use painters tape so that it won’t damage the art or your walls or use cute ribbon and clothes pins to hang the art
3.  give, give, give.  Your children can use their art to give as cards, gifts, and wrapping paper to relatives, neighbors, babysitters, etc.
3. file the “keepers”.  These are the ones that touch your heart,  show their developmental stage, or are extra special to your child.   Use sticker address labels to place on the back of these treasures and write their name (especially if you have more that one child), date, and note any special memory or information your child wants to share.  Keep them in a legal size file folder and place in a plastic bin.  Keep one folder per school year.  If the folder gets too big, it is time to sort through it again!  At the beginning of each year have your child paint their handprints on the outside of the folder, write their name and school year
4.  frame one OR two pieces from the year
5.  toss it (descretely)  I’ve been told, this gets easier, especially when our kids get older they can help in the decision making.
    I hope this gives you some ideas or gets you thinking about what system will work for you and your family.  This is just the beginning of out little one’s school career, which means there will be hundred’s, if not thousands of items that will be coming home from school in the next 14 years.  Enjoy their creativity and happy organizing!

Thursday, June 16, 2011

Father's Day Craft Ideas

These projects were done throughout the week.  Remember, have fun and it is the thought that counts.  Dad will treasure whatever their child gives them on their special day!
This year I thought I'd let my son be creative and have some fun, so we started with finger painting.  He enjoyed the process and mess, but not "gift" quality.  So we tried something else.   Hand prints and foot prints are always a hit so we went to the kitchen to make some dough together.  In a bowl mix 1 cups flour, 1 cups salt, 1/2 cup water, 1 T cooking oil.  Add more flour until it isn't sticky.  We added green food coloring, (daddy's favorite color) and mixed until blended.  We went outside and my son kneaded the dough.  After playing with the dough for awhile, I helped him pat out the dough on parchment paper.  We tried a few variations until we settled on a hand print.  I cut around it in the shape of a "D".  "D" is for Daddy.   Pole a whole at the top with a straw.  We left it in the sun to dry.  He will paint it when it is completely dry.  I will add a ribbon in the hole with this poem attached:  
D is for Daddy
I give my hand
to you this day!
Remember me now,
as I grow and play!

June 2011
My son drew a picture of his daddy.  And finally I ordered a card from Shutterfly. www.shutterfly.com  A special thank you to Shelbi for capturing this shot of my son.  http://www.shelbilynna.com/  You are an amazing photographer!
It will be a Father's Day to remember.

Friday, May 13, 2011

Rough T-Rex Using Egg Shells

After moving to a new area and finally getting settled, we are back in action.  I have been struggling to find activities my 3 year old son would want to do besides playing trains, car, and "crashing".  He recently has gotten into dinosaurs so I came up with the perfect project.  I liked the process and skills involved, but the final project wasn't as cute as I had hoped, but it was fun.
1.  Egg Shells - start saving your egg shells.  Wash them and keep them in a zip-loc bag until you have enough.
2.  Go online and have your child pick out a t-rex image on google to print.  I just typed "t-rex coloring sheet" and a bunch of images came up.
3.  Cut around the shape and glue it to construction paper.
4.  Start smashing and crushing the egg shells while still inside the zip-loc baggie.  Keep going until they are in small pieces.  Good way to build finger strength.
5.  Pour white glue on a paper plate and have your child "paint" the glue on the shape, then sprinkle the egg shells on top.


When it is dry you can talk about how rough the skin is on their t-rex and don't forget to practice their "roars". 

Monday, March 14, 2011

More St. Patrick's Day Fun

Who doesn't love the idea of finding a pot of gold at the end of a rainbow or finding a wee little leprechaun hiding in the grass.  They are so many fun things to do for St. Patrick's day.  Here are only a few...so have fun and may the luck of the Irish be with you!
1.  Leprechaun Paper Plate Art
2.  Rainbow Art using Do-A-Dot Markers  Younger children can just "dot" the paper with any color and design.  Older children can fill in a picture of a  rainbow using the correct colors. (see photos)
3. Rainbow Dancing - Purchase party streamers for all the colors of the rainbow and cut 2 feet strips.  Staple the colors together and folded an index card over to make it sturdy.  The kids used the rainbow streamers to dance to the music.  This is fun to do when playing the "freeze" dance.  The streamers sound like wind when the kids move around. 
4.  Chocolate Gold Coins - have your child estimate how many coins are in the pot.  Sort the cons according to size.
5. Don't forget the hunt! http://mrsodaniels.blogspot.com/2011/03/hunt-for-golden-letters-st-patricks-day.html

Hunt for the Golden Letters - St. Patrick's Day Fun

After all this talk about leprechauns and rainbows, we thought it would be fun to go on a hunt to find the Pot of Gold!  
1.  I had prepared the gold coins ahead of time.  I took gold (or yellow) card stock, cut them into 2 inch squares and cut off the corners to create the coins.  I then wrote the letters of the alphabet on the coins.  One side capital letters and the other side lower case.  I scattered the letter coins all over the grass.
2.  The kids made a pot of gold and rainbow basket to hold all the gold they find.  I cut a sturdy white paper plate in half and the kids colored the back of the plates black.  I took another sturdy paper plate, cut it in half and took one side and cut to make an arc.  The kids then colored it to look like a rainbow.  I stapled the rainbow arc into the pot.
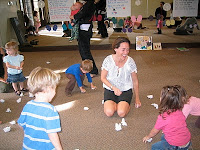
3.  Once they were done with their baskets, we headed outside to look for the leprechaun.  They were so surprised and excited to find gold all over the grass.  They quickly scooped up the gold and put inside their baskets.
4.  After all the gold was collected, we came back inside to sort through all their letters.  The kids said this was the best day ever!!!!

Thursday, March 3, 2011

The Wind Blew


 The Wind Blew 
1.) After reading the story, The Wind Blew by Pat Hutchins practice blowing through a straw to see what objects can move by creating "wind".  Use cotton balls, leaves, rocks, or whatever else you can find in your backyard.  2.) Made a paper kite.  Cut out a diamond shape from construction paper and tape a piece of yarn on the back.  Use a paint brush to apply white elmer's glue all over the kite shape.  Place shapes cut out of party streamers or scrap construction paper to create a rainbow kite. 

Sunday, January 30, 2011

Snowflakes

Here are just a few fun things to do with snowflakes
1.  Cut snowflakes out of coffee filters and let your kids color or paint them
2.  Paint your child's hand white and put down on blue paper to create a snowflake. 
3.  Snowball Fight!  Take white tissue paper or white copy paper and crumple them up.  Then toss around or at each other.  Let the fun begin!  You can also write a letter on the paper before your crumple up. After the few tosses, call out a letter and have the kids see if they have the special snowball.

Mittens

There are so many fun activities to do with mittens 
1.  Matching mittens - cut out paper pairs of mittens using different colors and sizes.  Have your child match and count the pairs.  Talk about which ones are small, medium or large.  You can also practice rhyme.  "This mitten rhymes with mellow, can you find the _____ (yellow)."
2.  After matching, have them paint the mittens.  For kids who are older, you can talk about symmetry. 
3.  Read Three Little Kittens or The Mitten by Jan Bret
There are lots of ideas and activities on Jan Bret's website.http://www.janbrett.com/put_the_animals_in_the_mitten.htm

Sunday, January 2, 2011

Happy 2011

2011 looks to be an exciting year!  It is January 2nd and we started potty training.  I don't know if there is ever the right time to start, but I figured it is a new year and we don't have much going on this week.  I am so grateful for Facebook.  I wrote a post asking for suggestions and I was amazed by all the responses.  Most importantly I got the support and confidence I needed from my friends.  Day One complete: two stickers on the "train track" sticker chart and lots of wet underpants.  Time for laundry.  Looking forward to another day of hanging around the house tomorrow!
This is the site I found the train potty chart.  There are others to choose from...
http://www.childavenue.com/pages/family_corner_pages/printables.html