Friday, November 30, 2012

Favorite Recipe for Hand/Paw Print Christmas Ornament

Another rainy day, another craft!!!  This one by far is the easiest.  Two 4 year old boys measured and mixed the dough to create their own ornaments.  Great gifts for grandma and keepsakes.

Recipe: per child, about 4 hand prints but depends on size of hands
Mix together
1 C flour
1/2 C salt
1/2 C water

Knead 10 min. to form firm ball.  If sticky, add small amounts of flour.  Great way to strengthen hand muscles!  Should be like play dough.

Roll dough on a lightly floured surface to about 1/4" thickness.

Press hands or feet into the dough.  Use a cup or bowl to make into a circle shape and use a straw to poke a hole for ribbon.

Leave out to dry or bake in oven at 250 degrees.  Keep an eye on it!

Options:  add food coloring to the dough
Use cookie cutters or stamps
Paint  
 
Kneading the dough

Making a ball
Rolling the dough
Press hand - don't forget to poke hole for ribbon


I pressed baby's hand while he was asleep!  

Works great for paw prints too!

Wednesday, November 28, 2012

Homemade Ornaments Option #1


The holidays are upon us and we are stuck indoors due to the rain.  I did some research online and found two recipes, one of which I have used in the past.  Initially I wanted to do hand prints but I found this recipe best for using cookie cutters and stamps. (My next post will be the recipe for hand prints.)  That being said, this project was easy, fast and fun.  We were able to make these while my two month old napped.  I cut this recipe in half and it made about 10 ornaments.  Next time I will make the whole recipe.  Once air dried, we will paint and add ribbon to hang on our tree or attach to gifts,


Recipe:  yields about 20 ornaments
2 cups baking soda
1 cup cornstarch
1 1/4 cup water


1st xmas


Add ingredients and stir constantly
When it looks like mashed potatoes - cool with damp cloth covering it


Roll it out on a surface lightly dusted with cornstarch to about 1/4 inch, cookie cutter and stamp (optional), make hole for ribbon
Ready to play...done crafting!   

Air dry.  Paint, glitter  or leave white.


Friday, November 16, 2012

Popcorn Turkey Surprise

This year I brought in a turkey for my son's preschool class.  This wasn't your ordinary turkey, it was a popcorn turkey!  It was so fun to watch the eyes of the kids as the teacher carved the turkey.  They all enjoyed their Thanksgiving Feast!
The body of the bird was made from a large grocery bag turned inside out and stuffed with popcorn.  I folded the ends in and hot glued it shut.  The drumsticks were made from two lunch size paper bags.  I formed the bag around my fist first and then filled.  I put a rubber band around the end.  I took a white piece of paper and cut slits on it and attached it to the  end of the drumsticks.  Then hot glue the drumsticks onto the body of the bird.  Place on a platter.  YUM!!!

"Hand" and "Foot" Turkey craft

Gobble, Gobble, this turkey is one of a kind and has a lot to be thankful for this year!
You need construction paper (various colors) glue, scissors, and markers.
The body is made by tracing the child's foot on brown construction paper.
The feathers are the child's hand.  I had my son do 4 feathers to match his age.  He picked his favorite colors.
This craft can be done with any age and parent help varies with the child.  My son is not a big fan of crafts so I cut out the hand prints and did the writing.  He did the rest.  We used "teamwork."  It will be fun to do this project again next year to see what he is thankful for.

Happy Thanksgiving!

Wednesday, October 24, 2012

Edible Witches Hat

 Edible Witches Hats
This year we wanted to make an edible Halloween craft that would be easy, quick, fun and delicious.  Thinking we would do the spider made out of a cookie and pretzel for legs, I found this idea instead. 
Supplies:  ice cream cone, round cookie for the base, frosting, Halloween sprinkles and a gummie worm or spider, plastic knife or popsickle stick to spread the frosting, and paper plate to hold the creation. 
Then it is time to have some fun...put frosting on the cookie and press the ice cream cone onto the cookie and DECORATE! 
Note to self: Find a bigger cookie than the fudge striped cookie so there is more of a brim of the hat to decorate.  Also, use food coloring for the frosting.


Stayed tuned for the ice cream cone Christmas tree - another holiday favorite!
http://mrsodaniels.blogspot.com/2010/12/edible-christmas-trees.html

October Words - Beginning Sounds

There are so many fun and spooky words for the month of October.  I found 8 Halloween images on my computer Printshop program and printed them out.  Then I had my son cut them out and glue the image on the letter that matched the beginning sound.  This was an easy and entertaining way to review beginning sounds.

I prompted the activity with:  "Ghost...what sound do you hear when I say the word ghost?"  He would look for the letter and glue it down.  Then I would ask him to pick a picture and tell me what it was, then what sound he heard.  
For a challenge:  try ending sounds


Friday, August 17, 2012

Back-to-School Fairy

This year I have been introduced to the Back-to-School Fairy and am so excited!  Heading back to school always has so many mixed emotions and this is the perfect way to ease any fears.  This concept can be modified for your family but hopefully can be a new tradition to start each new school year!  Whatever the Fairy brings, make sure it is something they need - not just a reason to buy more toys!
Message and PJ's from the Back-to-School Fairy
1.  Back-to-School PJ Fairy - I'd like to thank my college roommate and now mother of three beautiful girls for this idea.  Her girls found this adorable message and brand new PJ's the night before school started.  You could also put some special fairy dust under their pillow.
I brought you some jammies to wear tonight, 
I hope they take away back-to-school fright!
You will do great!  You can hardly wait!
Jump in bed - Don't cover your head.
Good Night...Sleep Tight...Sweet Dreams!
Love, the Back to School Fairy


2.  Back-to-School Book Fairy - There are so many great books about starting school.  Inscribe a special message inside from the School Fairy wishing them a great year.  Don't forget to write the date inside!
The Storyteller: 30 Lafayette Cir, Lafayette, CA 94549  (925) 284-3480


3.  Back-to-School Fairy Breakfast - Prepare a special, healthy breakfast from the Fairy.  Make a personalized placemat, Welcome to First Grade!

4.  Special Delivery - Tell your child to place their backpack outside their bedroom and in the morning, the Back-to-School Fairy will deliver something special.  You can put school supplies, new shirt, snacks or new water bottle.

5.  School or Class Mascot - The Back-to-School Fairy can surprise them with a small stuffed animal of their class or school mascot.

6.  Special Message from the Fairy in their lunch on their napkin

There are so many fun ideas!  You can bet your child will look forward to starting school each year with the return of the Back-to-School Fairy!  Just think, you could also send a care package to your college student from the Fairy.

Have a great year!


Saturday, August 4, 2012

Beginning Sounds Game

Beginning Sound Game
Like most kids, we have a large collection of plastic animals, cars, and toys.  I had my son collect 20 animals and put them in a small tub.  While he was busy collecting his toys, I took a piece of construction paper and divided it into 24 squares.  I wrote the alphabet letters in the top of each square.  (Letters U/V and X/Y shared a box.)  When he was done, he recounted the animals and then the game began.  He had to place the animal in the correct box depending on the beginning sound of the animal.  For example:  Spider, what sound do you hear when you say spider?  He would place it on the letter Ss.  When he was done, I asked him to find other toys that would fit into the empty boxes.  We looked at which box had the most toys.  It was a fun and educational way to play with his toys!
For a challenge:  Do the ending sounds of the animals and toys!

Wednesday, May 30, 2012

Photo Placemat


Class Photo Placemat

As a good-bye gift for the kids in the preschool class, we make a photo collage placemat.  I made an 11x14 (legal size) collage of photos using Print Shop.  Any photo program will work.  I made color copies at the local UPS store and glued it on a full size piece of construction paper.  On the reverse, each child made their hand prints out of white paint.  I then printed out the prayer that the kids said each day at snack.  You can write special memories or poem.  Once complete, I went to Lakeshore Learning and laminated them.  I found this to be the best price for laminating.
Each child will have a special mat of all their class friends to use for eating or playdough/crafts.

Monday, May 28, 2012

Our Teacher has Heart and Soul - Class Gift

As the year comes to an end, our class generously gave money toward a gift card for our teacher's favorite places.  We also wanted to make sure they had something to "remember" this class.  We decided on an apron, which any primary/preschool teacher can use.
I planned a class park date and we were able to complete this project  at that time.
All materials were purchased at Michaels Arts and Crafts.  Red apron, white fabric paint, Sharpie paint pen and sponge paint brush.  Additional items: WET WIPES

I wrote: "Miss Luci has HEART and SOUL" near the top of apron.  Then I had the kids take turns painting their foot or hands.  *Make sure the apron is turned upside down when painting the hands to make it look like a heart.  This paint dries relatively quick.  I wrote the child's name below their prints and the name of the school and year at the bottom of the apron.
My son pressed his hands in a giant red ink pad to make the bag for the aprons and filled it with red tissue paper.  You can also use red paint.

This project cost approx. $15 for 2 aprons, one bottle of paint and one paint pen.

The teacher's loved it!

* This would be a great gift for Fathers, Mothers or Grandparents! *

Do you have any fun ideas to share???  :)

Saturday, May 5, 2012

Teacher Appreciation

Trusting Tigers door decoration
Pencil vase
I'm a little late posting this but here you go...

The class will be bringing flowers to the teachers on Tuesday.  As Room Mom, I wanted to make sure they had a place to hold their flowers.  I found this idea online, so here you go:  This cost approx. $15 for two vases.  I found 2 jumbo cans of Campbell's soup at Big Lots for $1.50 each.  They were 50 oz.  The Dollar Tree had colored pencils, 10 for $1.00 The large soup can needed 48 pencils!  The ribbon was from Michael's.  I would recommend a smaller can if you are making this as a gift from one child.
Directions:  Empty, clean and dry the soup can.  Place on it's side, put a small amount of hot glue near the top and bottom and place a few pencils in place, press.  Continue all around the can.  Place a rubber band around it to hold in place.  Then put a drop of hot glue in the middle and attach the ribbon.  Wrap around and tie with a bow.
For a finishing touch, create a sign to put into the vase, "Thanks for helping us bloom!"  or if you have a class photo write, "Look how we've grown!  We appreciate you!"
This bouquet of flowers will be sure to brighten their day! 
Doesn't take long to assemble!   


Friday, April 20, 2012

Mother's Day Gift Ideas

It is that time of year when we are struggling to find some meaningful and heartfelt gift for our moms or mother-in-laws.  Usually it ends up being a photo of the family or kids.  Yes, they love photos, but after awhile they run out of space to display these cherished images.  Here are some inexpensive alternatives that she will love and be proud to display.

Photo Flowerpot:  Originally saw this idea on www.pinterest.com under Teacher Gifts but thought Grandma would love and appreciate it too.  You can use photos of your family or include photos of all the grandchildren and/or their families.
Depending on the number of photos, chose a terracotta pot to fit.  Print the photos on regular printer paper.  You or your child paint the pot first.  When dry, modge-podge the pictures onto the pot.  Once everything is glued down well (with some coats on top) spray the whole thing down with some clear acrylic spray to remove any stickiness. 
http://pinterest.com/pin/200410252138059128/
I found this quote that would be the perfect finishing touch:   "A garden of Love grows in a Grandmother's heart."  Author: Unknown


Garden Stone:  These are always a hit and easy to make.  Handprint or footprints make it a special keepsake.
Brag Bag and Shutterfly 8x8 book

Brag Bag: Paint your child/children handprint using fabric paint on a canvas bag.  Once dry, put a special book about Grandmas or if you have time, a digital photo book inside.  She can take this anywhere and show off to her friends.
One of my favorite books for Grandma is The Gifts of Bring Grand and Grand-O-Grams by Mariane Richmond.  www.amazon.com
 "The Gifts of Being Grand", for grandparents everywhere, pays tribute to the special joys and rewards of grandparenthood.  You can have your child add a letter to grandma telling the reasons why they love them or have them draw a picture.  "Grand-O-Grams" is a bound book of 40 everyday and seasonal postcards that allow grandparents to keep in touch with those precious grandchildren.  I added a book of postcard stamps. 
The Storyteller in Lafaette has a great selection of books. 30 Lafayette Cir Lafayette, CA 94549 
Craft supplies and garden kits can be purchased at Michaels in Pleasant Hill.


Monday, April 9, 2012

Parent Praise

Hear what parents are saying:
I had the pleasure of attending Diana O’Daniels’ (“Miss Diana”) classes for 18 month – 3 year olds for 5 months. I have nothing but wonderful things to say, and in fact I am disappointed that she has relocated because I was hoping to take her class with my second child who will be 18 months in July.

With my oldest child I took several Music type classes and Paint, Paste and Pour classes and I would by far say that Diana’s class was head and shoulders above these classes. I enjoyed the format she used for her class, which consisted of a 50 minute class which had a daily theme broken up into a simple, yet creative and fun art project, followed by music, discussion, and story, all tied into the theme, then followed by time for the kids to get up, march around and dance, play with instruments, scarves, or balls…needless to say it was a packed 50 minutes, which was perfect for the attention span of a toddler. I LOVED the fact that I was getting a little bit of everything in her class: art, music, movement, and on top of that, there was education tied in. Some of the topics that we covered were rain, rainbows, frogs, worms, trains, butterflies… and there was a small informational lesson about each topic, tied into introductions to letters, colors and numbers. The cherry on top of all this was Miss Diana. She is kind, patient, fun and engaging.  Diana has a fun and appealing class to match her personality which kept me coming back. The only reason we stopped attending her class is because my son began attending school which interfered with Diana’s class, and as I previously mentioned I was looking forward to signing my second child up for her class once he was old enough. I am very disappointed that we don’t have her class anymore, and there is nothing that even comes close to replacing it in our community. Our community took a big loss when Diana left.
  - Ann, San Clemente


Dear Miss Diana,
Thank you so much for the pictures and for making this an amazing class. Nicholas and I have done a lot of "mommy and me", music, art, and gym classes and this is by far the most interactive, organized, and fun. Thank you so much for all the effort you put into making this class very worthwhile for the children!
See you next week and definitely next session!
Nicholas' mom


If you haven't heard of this class...and you haven't heard of Mrs. O'Daniels...then you HAVE TO CHECK IT/HER out!!!  Marcos took her class in the fall at the Talega Swim and Athletic Club and it was amazing!!!!!!!!!!!!!!!  I can't sing enough praise for Mrs. O'Daniels.  She is smiley, loving, energetic, smart, and super enthusiastic.  One of the best teathers I have EVER seen.  Marcos LOVED it and learned a lot.  Check it out!!  You won't be disappointed.  We love it so much, we are doing it again!!!  


Wednesday, April 4, 2012

Easter Basket Fillers

Chocolate and jelly beans galore, but not what I want my kids to eat early Easter morning.  Do we have candy, YES.  However, I try to limit the amount and have other fun items too.
Here is a list of non-candy items to fill an Easter basket:
bubbles
sand toys
art supplies or coloring/activity books
play dough
sun glasses
swim suit or sun hat
garden tools/packets of seeds
kite
books
real carrots with the green attached
chap stick

Non-candy items to put into the plastic eggs:
coins
stickers
erasers
rings
Cheerios cereal, goldfish, raisins, bunny crackers
play dough
army men
leave some empty

What do you include in your child's Easter celebration?

Dear Easter Bunny

Every year we write a note to the Easter Bunny and place it in our basket with some fresh carrots.  This is a great opportunity to ask the Easter Bunny any questions, like how do you hide all the eggs or decorate some many?  As the parent, take this opportunity to have your child help you "sound-out" beginning sounds to some of the words and model how to write a letter.
In the morning, most of the carrots are gone or half eaten and the Easter Bunny leaves a note thanking us for the delicious carrots.

Happy Easter!

Thursday, March 29, 2012

Spring Gift to make for GIRLS or MOMS

I confess, I made this craft for my girlfriend's birthday, but can easily be made by kids too!  It was fun and easy to get creative on this Spring garden scene.  I picked out some flower hair clips at the store (Forever 21) and then set to work to make this card.  Using a single sheet of 8 1/2" x 11" blue card stock paper I cut small slits where I wanted to place the flower clips.  The rest is the Spring picture was made from card stock too.  When complete, place the clips and write a special message one the bottom.
This would great for Mother's Day, teacher appreciation, or a birthday gift.

Saturday, March 24, 2012

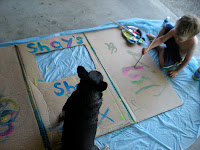
What to do with Large Pieces of Cardboard

It seems like since our move we have had large boxes lying around.  So we decided to get creative when they all did not fit inside our recycle bin.  *FYI...if you are in need of some cardboard you can always go to your local hardware store and ask them for some!
Here are some ideas:
1.  Puppet Theater:  Unfold the box and lye it flat on the floor.  Cut an opening in the box to make the stage. Keep it simple or decorate theater with paint and curtains.  I used a kitchen towel and attached at the top with clothes pins for the curtains.  Once dry, stand upright and let the show begin!
2.  Race Track or Train Track:  Draw a track directly on the cardboard.  My son loves his race track.  I made a train track and brought it to my son's train birthday party at the park.  It was a hit!
3.  Turn the race track into a large board game by drawing lines to make spaces.  Decide which space you need to stop and get gas (lose a turn) or where your can "zoom" ahead and move ahead two spaces.   Take turns rolling a die and move along the track.  Who will be the winner of the race?  *You can also write letters or numbers on the spaces and have your child tell you what is on their space.
4.   House Hunt:  Draw a simple picture of your house which includes windows, door, rooms.  Go on a hunt around your house to look and count the number of doors, windows, rooms, tv's, bathrooms, tables, etc.  Record the information on your house drawing.  Have your kids come up with things to add and count.
I found this website that has 32 Uses of Cardboard Box...have fun!
http://www.tipjunkie.com/32-things-to-make-using-a-cardboard-box-diy/
These projects are easy to store - fold up and put in closet or under bed.

Thursday, March 8, 2012

St. Patrick's Day O'FUN

Individually wrapped treats in the pot
Don't let this St. Patrick's Day go by without a hunt for the gold with your kids.  There are so many different ways you can do it and they are ALL fun!  Here are some ideas to put in your pot of gold.  I take my black cauldron from Halloween and fill it with bright yellow tissue paper.  Then I wrap up treats in yellow tissue paper and tie.  That way each child gets the same number of coins/treats.  Some treat ideas include plastic gold or green coins, small bottle of bubbles in colored containers, chocolate coins wrapped in gold foil, Hershey kisses or nuggets (most contain almonds so check for nut allergies), Reese's Rollo (chewy caramel inside), peanut butter cups.  Just check out the candy isle for other ideas.
*NO suckers or hard candy.  Children are excited and the last thing you want them to do it run around with hard candy - CHOKING HAZARD!
 
Leprechaun Disguise

1.  Follow the Green String:  Each child has their own string that they have to follow.  Along the way you can place coins on the string, wrap it around trees, under chairs, or over benches.  At the end will be the surprise.  If it is a larger group, you can do one string and all the kids follow.  This is good your younger kids.
2.  Have clues written on green shamrocks and the kids have to follow them to get to their pot of gold.
3.  The Letter Hunt:  perfect for ages 4-6 and they LOVE IT!   http://mrsodaniels.blogspot.com/2011/03/hunt-for-golden-letters-st-patricks-day.html

Easy Decorations:  Hang party streamers the color of the rainbow from your doorways.  The kids have to walk "through the rainbow"! (more ideas for using the streamers: http://www.blogger.com/posts.g?blogID=5912000420279799351&searchType=ALL&txtKeywords&label=St.+Patrick%27s+Day

Easy activity:  Rainbow Bracelets:  use pipe cleaners and kids string fruit loops on the pipe cleaner for make a bracelet.  Good thing to do until everyone is ready for the hunt.

Snacks:
Snap peas, green grapes, lucky charms/fruit loops, kiwi, cucumbers, rainbow sherbert or mint and chip ice cream.  Be sure to serve ice cream in "wee" sized bowls and "wee" spoons found at your local ice cream store (the ones used when you sample the flavors).  I have been looking for mini ice cream cones, but have not found any yet. 

Have Fun!

Thursday, March 1, 2012

Celebrate St. Patrick's Day and Rainbows on March 10th

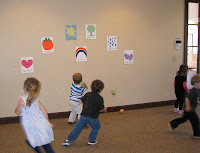
Come celebrate St. Patrick's Day and Rainbows with your wee ones (18 months - 4 years) at the Moraga Library, Saturday March 10th from 10:00-10:50.  Miss Diana will be leading this fun, interactive Parent and Me class. We will be talking about color, playing Irish games, rainbow dancing, and marching with musical instruments while spending the morning creating happy memories with your wee ones.  Be sure to have your child wear some clothing that represents their favorite color of the rainbow.

Parent and Me Class Theme: St. Patrick's Day and Rainbows
When: Saturday, March 10 from 10:00-10:50
Where: Moraga Library: 1500 Saint Marys Rd  Moraga, CA 94556
Age: 18 months to 4 years
Cost: Free

MARCH and Green Food Coloring

Green food coloring is a must during the month of March!
For a healthier alternative try spinach juice, all the color, no taste. http://www.care2.com/greenliving/8-ways-to-make-organic-diy-food-coloring.html

March 2 is Dr. Suess' Birthday.  Don't forget to read, Green Eggs and Ham by Dr. Seuss and make some green eggs for breakfast.  Just a few drops of green and whisk before cooking.  A fun and memorable breakfast.
"I do so like
green eggs and ham!
Thank you!
Thank you,
Sam-I-am"

March 17 is St. Patrick's Day.  You never know where you might see some clues that those clever leprechauns visited your house.  A few drops of green in your child's milk or even in your toilet bowl.  Silly Leprechauns!

March 20 is the first day of Spring.  Make a batch on homemade play dough and add green food coloring.  Click here for easy directions: http://mrsodaniels.blogspot.com/2010/08/playing-with-playdough.html

Sunday, February 12, 2012

ZINGO!

ZINGO!
Playing board games not only brings the family together creating memories to be cherished but teaches many valuable skills, academically and socially.  We introduced our first "board game when my son was a little over 3 years old and it was Candyland.  It brought back so many fond flashbacks from my own childhood.  It was amazing how quickly my son picked up on the concept of getting first to the candy castle.  Now at age four, he is really into games and it is so much fun to play with him.  He received Zingo by ThinkFun for his birthday and it was an instant hit.  Some of our other favorites include Memory (There are so many versions to choose from so pick a theme your child likes.  Be sure to start with just a few cards/matches and add more as your child becomes more confident and is ready for a challenge) and Hi-Ho Cherry-O by Hasbro.

What are your some of your favorite games to play with your kids?

http://www.scholastic.com/resources/article/the-benefits-of-board-games

Wednesday, February 8, 2012

Love Bug

WORK IN PROGRESS...
You've Been Bitten By MY Love Bug.  Happy Valentine's Day!
Supplies: popsicle sticks for the body, pipe cleaners for the antennae, construction paper to cut small heart for the head and two larger hearts for the wings (color your choice) and any fun decorations you have around the house such as glitter, stickers, buttons, etc... and white glue.
Love Bug Assembly Line
Today we started our Valentines...it will take a few days due to train and truck distractions.  If your child is really into crafting this is a perfect craft.  However, we completed TWO Love Bugs today and have one week to decorate the remaining ten needed for his classmates.  Wish us luck!  :)
First 2 completed and drying in the sun.